又到一年七夕节,祝愿全天下的有情人终成眷属。
一直以来项目中都是使用别人的框架,使用起来很熟练,但是源码一般都是大致粗略的看一下,弄懂整个流程就不去管他了,这段时间我都是在跟源码打交到深有体会,除非知识有一定的沉淀,否则学到的终究只是皮毛。所以打算想要学习的更深入,建议还是多多看源码,不光技术提升,对设计模式、封装思想也会有更深刻的领悟。
本篇文章不涉及如何自定义ButterKnifeAPT插件,如果需要请浏览我写的Demo,效果图如下:
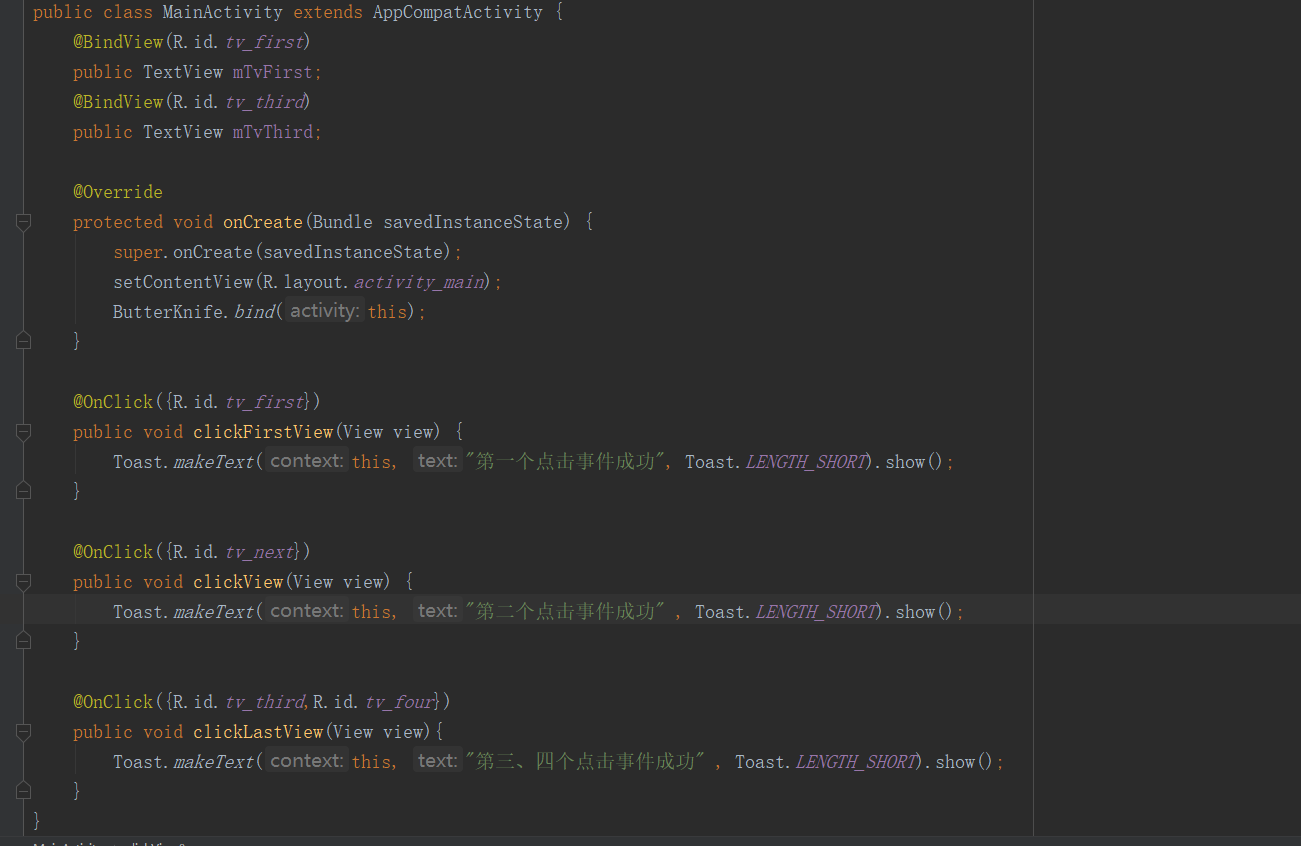
基本的BindView(),以及OnClick()是没有问题的,至于其它的BindColor()原理都是一样
ButterKnife简介
ButterKnife是由Android之神JakeWharton开发出来的,通过APT在编译时期获取Java代码中相应的注解并生成对应代码,告别了传统的手动findViewById(),setOnClickListener()等,从而提升代码可读性、开发效率。
ButterKnife工作流程
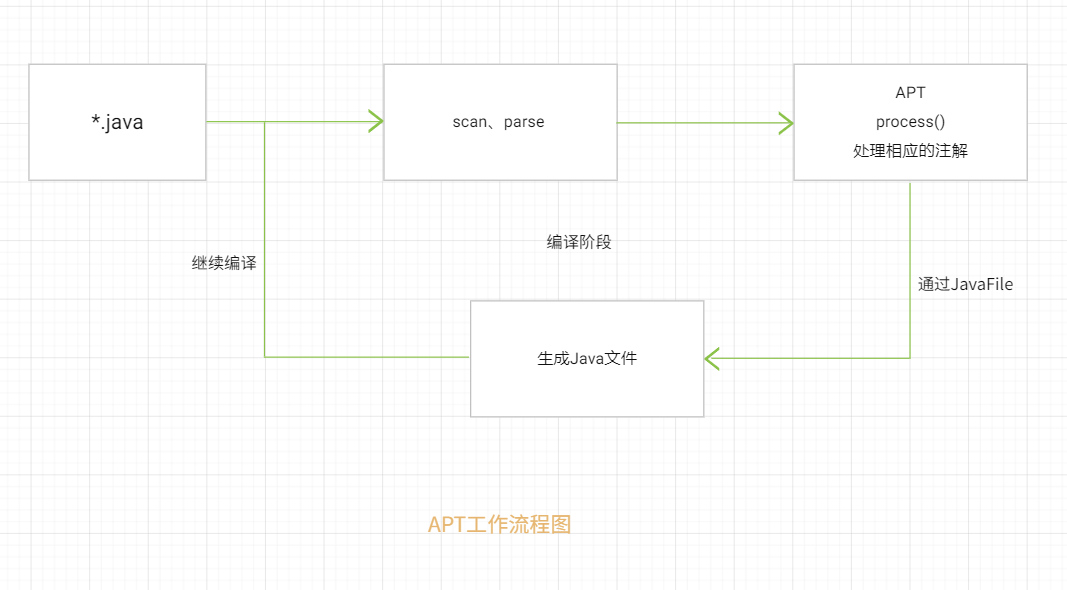
APT工作流程大致为两步:
- APT通过扫描解析Java源文件,获取相应的注解,并通过注解生成相应的Java文件。
- 生成的Java文件后继续编译,APT继续扫描,如果有相应的文件生成则继续重复此步骤。
ButterKnife源码分析
- 首先我们看下ButterKnifeProcessor#init()初始化
1 | (Processor.class) |
抽象语法树(AST): 全称为abstract synatx tree,是通过语法分析器将源代码读入、解析,并建立语法树。
为什么这里需要使用到AST?
我们在使用ButterKnife时,我们知道在使用一些注解时比如BindView(R.id.tv_content),其中R.id.tv_content 必须是常量,但是在我们library项目中所有生成的资源ID是静态变量,这也是为什么我们在library中资源文件为什么不能使用switch-case的原因。从而导致了ButterKnife不能正常使用。
为了解决该问题,通过利用AST拷贝一份R.java命名成 R2.java,R2.java 里面的资源声明都是 final 的。这样就躲过了语法检查。同时使用自定义TreeScanner扫描注解中的资源声明例如R.id.tv_frist拿到tv_first存储起来,后续遍历生成源文件时写入。这里下面分析他是如何做到的,这里就不再过多描述了。
1 | (Processor.class) |
接下来我们分析一下findAndParseTargets()
1 | private Map<TypeElement, BindingSet> findAndParseTargets(RoundEnvironment env) { |
1 | private void parseBindView(Element element, Map<TypeElement, BindingSet.Builder> builderMap, |
这里主要做了三件事情:
- 校验@BindView作用范围、作用对象是否正确,其次校验是否是作用于View对象获取View的子类对象。
- 通过创建BindingSet.Builder对象,然后将获取到的注解 id、name 、type 存至该对象。将BindingSet.Builder存放到builderMap中,用于后续过滤去重或者添加其它属性。
- addField() 将注解对象添加至builder对象中
这里创建BindingSet.Builder对象不仅仅是用于存储某一个注解的单独属性,它存储的是同一个类型所有注解属性、方法,用于后续遍历生成Java文件时写入相关的代码
- 校验如下:
1 | //1.这个方法主要是校验修饰符、作用是否在class中、最后再校验class修饰符 |
校验就到这里结束了,主要做了这几个判断:
注解作用对象,作用类,修饰符检测以及判断是否是View类型或继承类型
1 在BindingSet.Builder构建之前,通过 #elementToId(element, BindView.class, id) 生成了一个Id对象 。
下面我们看看具体做了什么:
1 | private Id elementToId(Element element, Class<? extends Annotation> annotation, int value) { |
主要就是创建注解所对应的Id对象,这里有两个关键的东西:
- JCTree : 在编译时期我们的代码会被JavacParser按照一定的规则进行解析形成具有一定结构的语法树,每一个语法树上的节点我们称之为JCTree,JCTree包含了对象所在语法树上的位置(pos)、类型(type)等信息
- Symbol :我在这里就把它看作是包含TextView部分属性的一个对象,Symbol专业描述点这里
为什么不直接通过反射获取注解里面的属性,而要通过获取JCTree上节点?
我们知道 Android 项目中会通过自动生成一个 R.java 类的方式来保存项目中所有资源文件的标识。在主项目中生成的 R.java 中的资源声明是一个静态常量,而在 module 中它却是一个静态变量。这是为什么呢?我们知道在 java 中如果某个值被声明成常量(用 final 修饰),则在编译后,该常量会被直接替换成值。
而通过获取到JCTree上节点具体的字段属性目的就是后续文件写入时将R2.id.tv_first替换成R.id.tv_first。
AST到这里算是使用结束了,就是在编译时期获取相应的代码字段,存储在Id中,用于后续文件输出,也是避免library中资源id带来的一些问题。
- 2 分析 BindingSet.Builder对象构建:
1 | private BindingSet.Builder getOrCreateBindingBuilder( |
Builder对象基本的构建就完成,主要就是将获取注解、注解所在的class构建在一块,
当然这个对象不仅仅只是存储属性,后续的一些listener事件,color、drawable、string等资源需要初始化都将集中在BindingSet对象中
- addField() 将 生成的Id、FieldViewBinding对象添加至builder中,我们看看做了些什么操作吧:
1 | private void parseBindView(){ |
接下来看看是如何addFeild:
1 | //BuildSet.Builder |
具体分析ViewBinding对象
1 | final class ViewBinding { |
在butterKnife中@BindView、@OnClick 等listener存放都在这个对象中了。
其它的相关注解:
@BindViews() 存放在 FieldCollectionViewBinding对象集合中
@BindAnim() 存放在 FieldAnimationBinding对象中
…
我们回忆一下@BindView大致经历了哪些过程?
- process()开始,通过
1
2
3
4
5
6
7
8
9
10
11
12
13
14
15
16
17
18
19
20
21
22
23
24
25- 一些列判断过滤掉使用不当的注解对象,比如:修饰符 ```private```、```static```作用不在```View```或```View```子类的对象上,以及判断所在的class是否正确,如果位置错误(android.*,java.*)或者修饰符错误也将过滤。
- 通过创建```Id```,```FieldViewBinding```,```ViewBinding```将注解对应的属性,方法集中在一起,方便代码生成时一起输出。
> @BindView分析到此就结束了。下面分析listener()是如何添加到BingdSet.Builder对象中的。
##### 下面分析各种listener事件
```java
//仍然是在ButterKnifeProcessor # findAndParseTargets开始解析@OnClick
public final class ButterKnifeProcessor extends AbstractProcessor {
//各种listener adapter view checkbox 事件等等
private static final List<Class<? extends Annotation>> LISTENERS = Arrays.asList(
OnCheckedChanged.class, OnClick.class, OnEditorAction.class,
OnFocusChange.class, OnItemClick.class, OnItemLongClick.class,
OnItemSelected.class, OnLongClick.class, OnPageChange.class,
OnTextChanged.class, OnTouch.class
);
//开始遍历
private Map<TypeElement, BindingSet> findAndParseTargets(RoundEnvironment env) {
for (Class<? extends Annotation> listener : LISTENERS) {
//从这里开发解析
findAndParseListener(env, listener, builderMap, erasedTargetNames);
}
}
}
这里@OnClick为基准简单分析,由于流程跟@BindView基本一致,我将会省略大部分代码。
1 | //定义的OnClick注解对象 |
1 | //参数省略 |
简要的描述一下@OnClick的流程:
- 通过一些列判断过滤掉使用不当的方法,比如:修饰符
1
2
3
4
5
6
7
8
9
10
11
12
13
14
15
16
17
18
19
20
21
22
23
24
25
26
27
28
29
30
31
32
33
34
35
36
37
38
39
40
41
42
43
44
45
46
47
48
49
50- 然后将获取到的method对象的相关属性添加至MethodViewBinding对象中,在```builder.addMethod()```会先获取ViewBinding对象。
- 最后将ViewBinding交付于BindingSet.Builder统一管理进行管理,这一切操作都是为了代码输出时对象、方法能够一一对应的上。
由于之前分析过@BindView注解流程,@OnClick我就简单提了提。
##### 文件的输出,通过借助[JavaPoet](https://github.com/square/javapoet)编写
```java
//java文件创建从这里开始
private TypeSpec createType(int sdk, boolean debuggable) {
//创建com.zl.custombutterknife.MainActivity_ViewBinding 修饰符为public
TypeSpec.Builder result = TypeSpec.classBuilder(bindingClassName.simpleName())
.addModifiers(PUBLIC);
//是否final修饰
if (isFinal) {
result.addModifiers(FINAL);
}
//添加parent class and interface
if (parentBinding != null) {
result.superclass(parentBinding.bindingClassName);
} else {
result.addSuperinterface(UNBINDER);
}
//创建成员变量 target Activity,这里为MainActivity
if (hasTargetField()) {
result.addField(targetTypeName, "target", PRIVATE);
}
//根据创建builder时传入判断是View、Activity、Dialog,在构造方法中初始化属性,以及方法调用
if (isView) {
result.addMethod(createBindingConstructorForView());
} else if (isActivity) {
result.addMethod(createBindingConstructorForActivity());
} else if (isDialog) {
result.addMethod(createBindingConstructorForDialog());
}
if (!constructorNeedsView()) {
// Add a delegating constructor with a target type + view signature for reflective use.
result.addMethod(createBindingViewDelegateConstructor());
}
result.addMethod(createBindingConstructor(sdk, debuggable));
//添加unBind() 资源释放
if (hasViewBindings() || parentBinding == null) {
result.addMethod(createBindingUnbindMethod(result));
}
//build()正常情况生成Java文件
return result.build();
}
如果不了解JavaPoet,点击此处的火箭前往学习一个小时就能学会使用。
到这里就结束了,感谢观看。